Let's cut to the chase: Is the Breeze Cat Litter System the miracle it claims to be? After using it for three cats over three years, I can give you the straight answer. It's not perfect, but for one specific, maddening problem—litter box odor—it's the closest thing to a solution I've found. This isn't a fluffy sponsored review. We're going to break down exactly how it works, what it really costs (spoiler: it's more than the box says), the setup mistakes almost everyone makes, and whether your cat will actually use it.
What's Inside This Guide
- What is the Breeze Cat Litter System and How Does It Work?
- How to Set Up and Use Breeze Cat Litter
- The Real-World Pros and Cons of Breeze Cat Litter
- Breeze Cat Litter Cost Analysis: Is It Worth the Price?
- How to Transition Your Cat to Breeze Pellets
- Frequently Asked Questions (Answered by a Long-Time User)
What is the Breeze Cat Litter System and How Does It Work?
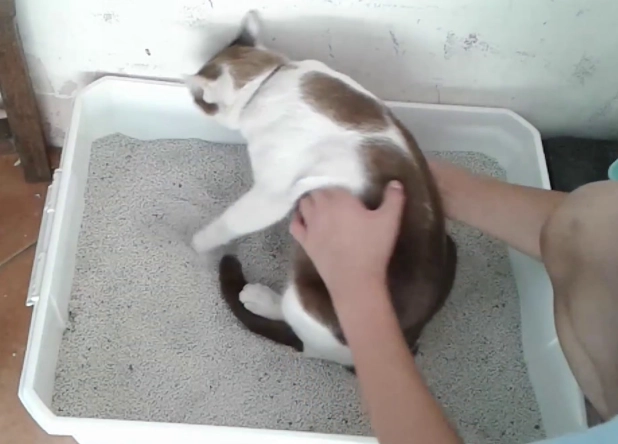
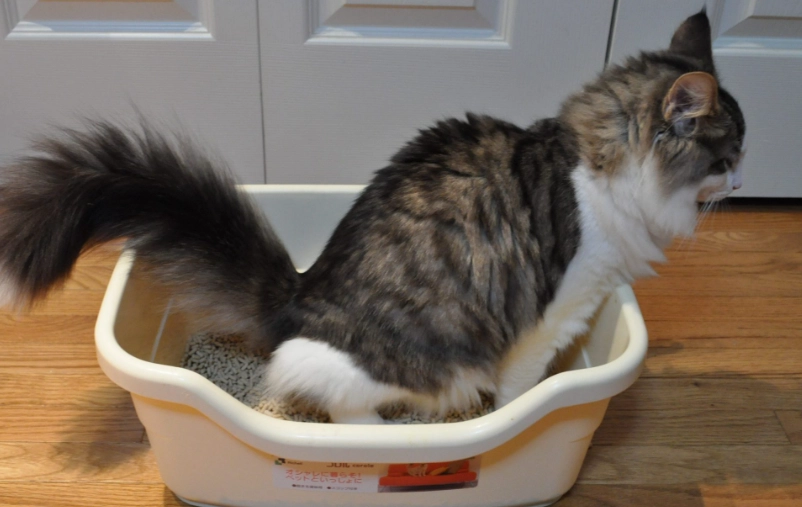
The Breeze System isn't just a new type of litter. It's a completely different approach. Forget clumping clay or silica gel. The system has two main parts: non-absorbent pellets and an absorbent pad that slides into a tray underneath.
Here's the basic mechanics. The pellets are made of something like baked clay or zeolite. They don't absorb liquid. When your cat pees, the liquid passes straight through the gaps between the pellets and lands on the pad below. The pad soaks it up and locks in the ammonia smell. Solid waste sits on top of the pellets, where it dries out quickly. You scoop the solids daily like normal, and you replace the pad once a week (or more often in multi-cat households). The pellets themselves last a month before you need to swap them all out.
Most litters, even the good clumping ones, have to manage both types of waste in the same medium. Urine gets trapped in clumps, but ammonia can still seep out. With Breeze, the pad is the only thing that touches the urine. It's a clever bit of engineering, honestly.
How to Set Up and Use Breeze Cat Litter
Getting it right from the start saves a lot of headache. The official instructions are a bit too simplistic.
Step-by-Step Assembly (The Right Way)
First, you need the Breeze Hooded Litter Box System or the open-top version. The hooded one is better for containing tracking. Assemble the box, then place the sliding drawer at the bottom. This is where the pad goes. Here's the trick everyone misses: unfold the pad completely before you slide it in. If it's bunched up, urine can pool on the plastic instead of being absorbed, leading to smells.
Next, pour the pellets into the top chamber. The bag says to use the whole thing, but if you have a smaller cat or a kitten, you can start with a 3/4 fill. Too many pellets make it harder for liquid to pass through. The ideal depth is about 1.5 to 2 inches.
The Maintenance Routine That Actually Works
Your daily job is scooping solids. Because the waste dries out, it's lighter and less smelly to scoop. You don't need a special sifter; a normal litter scoop works fine, though the holes need to be small enough to hold the pellets.
Weekly, you pull out the drawer and replace the pad. Don't wait for an indicator line or smell. Just do it every 5-7 days. Monthly, you dump all the pellets, wash the top tray with soap and water (no harsh chemicals, the plastic can retain smell), let it dry, and put in a fresh bag of pellets.
The Real-World Pros and Cons of Breeze Cat Litter
After three years, here’s the unfiltered breakdown. This isn't just a list of features; it's what you'll actually experience.
| Advantage | Disadvantage |
|---|---|
| Unbeatable Odor Control: For urine smell, it's phenomenal. The house genuinely doesn't smell like a litter box. This is its killer feature. | Pellet Tracking: The pellets get kicked out of the box constantly. They're hard, little beads that roll everywhere. You'll find them in your bed. |
| No Dust: The pellets produce virtually zero dust. A huge win for allergies and clean floors. | Upfront & Ongoing Cost: The system box is pricey, and the branded pads/pellets are a recurring subscription. It's a premium product. |
| Easy Solid Waste Cleanup: Dried waste is easy to scoop and has minimal odor. The daily chore is less offensive. | Some Cats Hate It: The texture is different. Some cats refuse to walk on the hard pellets or don't like the feel. |
| Long-Lasting Pellets: Not buying litter every 2-3 weeks is convenient. The monthly change is predictable. | Pad Leak Potential: If a pad is faulty or overloaded (multi-cat home), it can leak. The drawer isn't 100% foolproof. |
| Health Monitoring: Seeing un-clumped urine volume on the pad can alert you to potential health issues like diabetes or kidney disease. | Limited Availability: You mostly buy it online or at pet specialty stores. You can't just grab a refill at the gas station. |
The biggest headache for me is the tracking. I had to get a large, high-sided litter mat to catch some of the pellets. It helps, but it's not a complete fix. The odor control, though, makes up for it. For the first time, I could place a litter box in a living area without worrying.
Breeze Cat Litter Cost Analysis: Is It Worth the Price?
Let's talk numbers, because the marketing can be misleading. The starter kit (hooded box, pellets, pads) runs about $50-$60. That's just the beginning.
• Pellets: One 3.5 lb bag lasts ~1 month. Cost: ~$12-$15.
• Pads: One pack of 4 pads lasts ~1 month. Cost: ~$10-$12.
Estimated Monthly Total: $22 - $27.
Now, compare that to a premium clumping litter. A 20lb bag of a top-tier clumping litter might cost $18 and last a single cat about a month. So, Breeze is roughly $5-$10 more per month.
Is the extra $10 worth it? It depends on what you value. If litter box odor is your primary enemy and budget is less of a concern, then absolutely. You're paying a premium for the odor-control technology and convenience of less frequent full changes. Think of it as buying a coffee a week. If you're on a very tight budget, the math is harder to justify.
There are hacks to reduce cost. Some users find generic puppy training pads that fit the drawer, cutting the pad cost in half. However, the pellet size and porosity are specific, so finding a perfect generic substitute is trickier. I've tried a few alternatives, and the off-brand pellets often create more dust or don't let liquid pass through as well, compromising the system's core benefit.
How to Transition Your Cat to Breeze Pellets
This is where most people fail. You can't just swap litters overnight. Cats are creatures of habit and texture matters.
The Gradual Mix-In Method (Over 7-10 Days):
- Days 1-3: 75% old litter, 25% Breeze pellets. Mix them thoroughly.
- Days 4-6: 50% old litter, 50% Breeze pellets.
- Days 7-9: 25% old litter, 75% Breeze pellets.
- Day 10: 100% Breeze pellets.
Keep the old box available during this time. The key is to let your cat's paws get used to the feel of the pellets gradually. If at any stage your cat stops using the box, go back a step for a few more days.
The Big Mistake: Placing a layer of pellets on top of the old litter. This doesn't work. The liquid won't drain, the system fails, and the cat just digs to the soft litter underneath. You must mix.
For stubborn cats, try placing a few pellets around their food bowl or in areas they nap, so they associate the scent with positive things. Patience is non-negotiable.
Frequently Asked Questions (Answered by a Long-Time User)
 Can the absorbent pads really last a week without smelling?
So, is the Breeze Cat Litter System worth it? If your top priority is eliminating litter box odor from your home and you're willing to manage the tracking and slightly higher cost, it's a game-changer. It solves a specific problem better than anything else. But it's not a universal perfect fit. It demands a proper cat transition and a commitment to its specific maintenance rhythm. For me, the trade-off for a smell-free home was an easy choice.


Join the Conversation