Your Grooming Roadmap
Let's be honest. The idea of giving your dog a spa day at home can quickly turn from a cute Pinterest plan into a wet, hairy, slightly traumatic ordeal for both of you. I've been there. My first attempt at grooming my Golden Retriever, Murphy, ended with shampoo in my eyes, a soaked bathroom, and a dog who looked more like a damp mop than a proud retriever. It was a mess.
But over the years, and through plenty of trial and error (mostly error at first), I figured it out. Good dog grooming isn't about fancy salons or secret techniques—it's about understanding the why behind each step and having a clear, calm process. That's what these dog grooming tips are built on: practical, tested advice that turns a chore into a bonding experience. Well, most of the time. Some dogs will always hate the nail clippers, and that's okay.
We're going to break this down, not as a rigid textbook manual, but as a conversation between dog owners. We'll cover what you really need to know, from the absolute basics to the finer points that make a difference. Whether you have a short-haired Dachshund or a fluffy Poodle mix, the core principles are the same. You'll save money, reduce your dog's stress from car rides to the groomer, and most importantly, you'll be directly contributing to their health. Matted fur isn't just ugly; it's painful. Dirty ears lead to infections. Overgrown nails change the way they walk. This stuff matters.
The Non-Negotiables: Your Dog Grooming Toolkit
Before you even think about turning on the water, get your gear in order. You don't need a professional mobile groomer's van worth of equipment, but skimping on the wrong things will make everything harder. Here’s the breakdown of what’s essential versus what’s just nice to have.
I made the mistake of buying a cheap, flimsy slicker brush once. The pins bent the first time Murphy's thicker coat met it. A waste of money. Invest once.
The Core Four Tools
These are the workhorses. You'll use them every single grooming session.
- A Good Brush/Comb Combo: This is not one-size-fits-all. A slicker brush is fantastic for breaking up mats and removing undercoat in medium-to-long-haired dogs. A rubber curry brush (like a Kong ZoomGroom) is magic for short-haired breeds—it grabs loose hair and gives a great massage. And never underestimate a simple, sturdy metal comb. It's the final test after brushing to find any hidden tangles. The American Kennel Club has a great guide on choosing the right brush for your dog's coat type.
- Dog-Specific Shampoo & Conditioner: Human shampoo strips the natural oils from a dog's skin, leading to dryness and irritation. It's a hard rule. Get a gentle, dog-formulated shampoo. For dogs with skin issues, an oatmeal-based one can be soothing. Conditioner helps detangle and adds moisture, especially for dry or long coats.
- Nail Clippers or a Grinder: The great debate. Guillotine-style clippers are simple but can crush if dull. Scissor-style clippers offer more control. I personally switched to a grinder (like a Dremel tool for pets) because I'm terrified of hitting the quick. It files the nail down smoothly and there's no sharp edge. But it's noisy, and some dogs hate the vibration. Choose your battle.
- Ear Cleaning Solution & Cotton Balls/Gauze: Not Q-tips. Never Q-tips deep in the ear canal. You'll just push gunk further in. A vet-recommended ear cleaner and some soft cotton balls are all you need.
The "Make Life Easier" Extras
These aren't strictly necessary, but boy, do they help.
- A non-slip mat for the tub or sink. Dogs feel more secure when they're not sliding around.
- A handheld sprayer with a gentle shower setting. Trying to rinse with a cup is an exercise in frustration.
- High-value treats. This is your secret weapon. Small pieces of chicken, cheese, or commercial training treats. Bribery is not only allowed, it's encouraged.
- Towels. More than you think you'll need. I have a stack of old, absorbent towels just for dog duty.

The Step-by-Step Grooming Process: From Bath to Blow-Dry
Okay, gear is ready. Let's walk through the actual process. The order here is key. You always brush before the bath, never after on a wet coat.
Pre-Bath: The Brush-Out
This is the most important of all dog grooming tips for preventing mats. Bathing a matted coat will tighten the mats into near-concrete felt pads against your dog's skin. It's cruel and makes the job ten times harder.
Start with a thorough brush-out. Work in sections. Don't just skim the top of the coat—get down to the skin. Use your comb to check your work. If it glides through smoothly to the skin, you're good. If it catches, go back with the brush. Pay special attention to high-friction areas: behind the ears, under the armpits, around the collar, and the belly.
Bath Time: Keeping Calm and Carrying On
- Prep the Space: Close the bathroom door. Get your shampoo, conditioner, and towels within arm's reach. Place the non-slip mat down. Adjust the water temperature to lukewarm—test it on your inner wrist like a baby's bottle.
- The Soak: Gently wet your dog completely, avoiding the face and ears for now. Start from the neck and work back. Talk to them in a calm, happy voice. That first pour of water is always the jumpiest moment.
- Lather Up: Apply shampoo from the neck down, massaging it into a rich lather. This is a great chance to check for any lumps, bumps, or fleas. Don't forget the legs, paws, and under the tail. Let the shampoo sit for a few minutes as directed on the bottle.
- The Rinse: This is where people fail. Rinse, rinse, and rinse again. Soap residue is a major cause of itchy skin. Run your fingers through the coat against the grain. If it squeaks, it's clean. A conditioner can be applied after rinsing the shampoo, then rinsed out thoroughly as well.
- The Face: Use a damp washcloth to wipe the face. No direct spray. You can use a tiny bit of shampoo on the cloth for the facial markings, but be incredibly careful around the eyes.
Drying & Post-Bath Brushing
Towel dry vigorously. For dogs with thick coats, you might need three towels. I then let Murphy do his famous "zoomies-dry-off" sprint around the house, which gets another 30% of the water off.
For long-haired dogs, a blow dryer on a cool, low setting can help. Never use high heat. It can burn their skin. As you dry, use your brush or comb to gently guide the hair in the direction you want it to lie. This is when you'll see the final, fluffy result of your work. These post-bath dog grooming tips ensure you don't end up with a tangled mess once the coat dries naturally.
Nails, Ears, and Teeth: The Tricky Bits
These are the areas that cause the most anxiety for owners. They don't have to.
Conquering the Nail Trim
The fear is hitting the quick—the pink, blood-filled vein inside the nail. In light-colored nails, it's visible. In black nails, it's a guessing game.
- Method: Hold the paw firmly but gently. Make small, conservative clips. Look at the nail from the underside after each clip. When you see a black dot in the center of the newly cut surface, you're approaching the quick. Stop. For black nails, tiny clips are the only way.
- If You Cause Bleeding: Don't panic. Keep a styptic powder (like Kwik Stop) or a bar of soap on hand. Apply pressure with it. It stings briefly but stops the bleeding fast. Comfort your dog, give a huge treat, and try again another day. It happens to everyone.
- Grinder Alternative: If clipping is too stressful, a grinder lets you take off tiny amounts at a time with less risk of quicking. The downside? The noise and sensation bother some dogs more than the clip.
The goal is to keep nails short enough that they don't click on the floor. Long nails force the toe joints into an unnatural position, which can lead to pain and arthritis over time. The Veterinary Partner website has excellent, vet-written details on nail anatomy and proper technique.
Ear Cleaning Without the Drama
Ears should be cleaned weekly for floppy-eared breeds and every few weeks for erect ears. Smell is your indicator. Healthy ears don't smell bad. A yeasty or foul odor means a vet visit, not more cleaning.
- Squirt a liberal amount of vet-approved cleaner into the ear canal. (Not down the throat! Aim for the ear!).
- Gently massage the base of the ear for 20 seconds. You'll hear a squishy sound. This breaks up the wax.
- Let your dog shake their head (step back!).
- Use a cotton ball or gauze to wipe out the loosened gunk from the outer ear folds. Don't dig deep.
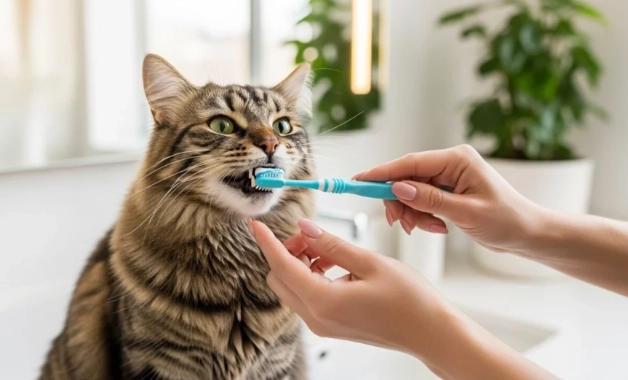
The Often-Forgotten Teeth
Brushing teeth is one of the best long-term health investments. Start slow. Let them lick dog-safe toothpaste (it's often poultry-flavored) off your finger. Then progress to rubbing their gums with your finger. Finally, introduce a soft toothbrush or finger brush. Even a few times a week makes a massive difference in preventing painful dental disease.
Coat-Specific Dog Grooming Tips & Schedules
Grooming isn't one-size-fits-all. A Chihuahua and an Old English Sheepdog have wildly different needs. Here’s a quick guide to frequency and focus.
| Coat Type | Brushing Frequency | Bathing Frequency | Special Tools & Notes |
|---|---|---|---|
| Short & Smooth (e.g., Beagle, Boxer) | Weekly | Every 4-8 weeks or as dirty | Rubber curry brush. Sheds seasonally—increase brushing then. |
| Double Coat (e.g., Husky, Golden, Shepherd) | 2-3 times per week (daily during blow-out) | Every 6-8 weeks | Undercoat rake, slicker brush. Never shave! It ruins the insulating coat. |
| Long & Silky (e.g., Yorkie, Maltese) | Daily to prevent mats | Every 3-4 weeks | Pin brush, metal comb. Consider a sanitary trim for hygiene. |
| Curly/Wiry (e.g., Poodle, Terrier mixes) | Every other day | Every 4-6 weeks | Slicker brush, metal comb. Often requires professional clipping every 6-8 weeks. |
See the pattern? The more hair, the more commitment. Being honest with yourself about the time you have for dog grooming tips like daily brushing is crucial when choosing a breed.
Solving Common Grooming Problems & FAQs
My Dog Hates Being Groomed. What Now?
This is the biggest hurdle. The answer is desensitization and positive association. It's not a one-session fix.
- Start Young: Get puppies used to being handled everywhere—paws, ears, mouth.
- Keep Sessions Short: Five minutes of positive brushing is better than twenty minutes of a wrestling match.
- Pair with Amazing Things: Bring out the brush, give a treat. Touch the nail clipper to a paw, give a treat. No actual grooming, just pairing the tools with good stuff.
- Know When to Stop: If your dog is panting, shaking, or trying to bite, you've pushed too far. End on a positive note with a treat, even if you didn't accomplish your goal.
For severe anxiety, talk to your vet. They can provide guidance or even recommend mild sedatives for specific tasks like nail trims. There's no shame in that.
How Do I Deal with Shedding?
You don't stop it, you manage it. For double-coated breeds, the "blow-out" season (spring and fall) is intense. Increase brushing frequency to daily. Use the right tools—an undercoat rake is a game-changer. Bathing with a de-shedding shampoo and conditioner, followed by a thorough blow-out and brush while drying, can pull out a staggering amount of loose undercoat. It's satisfying, in a weird way.
Mats Happened. Can I Fix Them?
Small mats can sometimes be gently worked apart with your fingers and then brushed out with a slicker brush and comb. Spray a detangling conditioner spray first. For large, tight mats close to the skin, do not try to cut them out with scissors. It's incredibly easy to cut the skin, which is often pulled up into the mat. Use blunt-tipped grooming scissors and try to slide the bottom blade under the mat, between it and the skin, before cutting. Or better yet, take them to a professional. Sometimes the kindest and safest dog grooming tip is to admit you need a pro with sharp clippers who can shave the mat out safely.
Should I Shave My Dog in Summer?
Almost always no, especially for double-coated breeds. That coat insulates them from heat as well as cold. Shaving it exposes their sensitive skin to sunburn and interferes with their natural cooling. For long-haired breeds, a trim to shorten the coat is fine, but a full shave is rarely the answer. Provide shade, water, and air conditioning instead.
When to Call a Professional Groomer
DIY dog grooming tips are powerful, but professionals exist for a reason. Here’s when it's smart to call one:
- For a Severe Matting Situation: As mentioned, this is a job for clippers and experience.
- For Complex Haircuts: If you want a specific breed clip (like a Poodle trim) or a neat, even all-over cut.
- If Your Dog is Aggressive or Dangerously Anxious: Groomers are trained to handle difficult dogs safely.
- For a Deep Clean or Special Treatments: Like for skunk spray or severe skin conditions requiring medicated baths.
- Simply to Save Time: There's no rule that says you have to do it all. Maybe you handle the weekly brushing and monthly bath, but take them in every 3 months for a nail trim, ear clean, and sanitary trim. That's a perfect hybrid approach.
The best dog grooming tips are the ones that work for your lifestyle and keep your dog healthy and happy. It doesn't have to be perfect. My Murphy still isn't a fan of the grinder, and I still get water everywhere. But we've found our rhythm. He's healthier for it, our bond is stronger for the quiet, caring time together, and my wallet is happier too. That's the real win.
Start slow, be patient with yourself and your pup, and celebrate the small victories. A calm brushing session, a successful nail clip, a clean, sweet-smelling dog snoozing at your feet after their spa day—that's what it's all about.
Join the Conversation