Let's be honest. The number one reason people put off cleaning their bird's cage is because it's a chore. It's not the fun part of bird ownership. You're not daydreaming about scraping dried food off bars or wrestling with a grimy tray. I've been there. I used to have a cage that felt like a punishment to clean. Every weekend, it ate up an hour of my time. Then I learned it doesn't have to be that way. An easy to clean bird cage isn't a luxury; it's a necessity for your sanity and your bird's health. The right design can turn a 60-minute scrub-fest into a 10-minute wipe-down. This guide is about finding that cage and mastering the routine.
What You'll Find Inside
Why Easy Cleaning Matters More Than You Think
It's not just about saving time. A cage that's difficult to clean often doesn't get cleaned as thoroughly or as frequently as it should. That's where problems start.
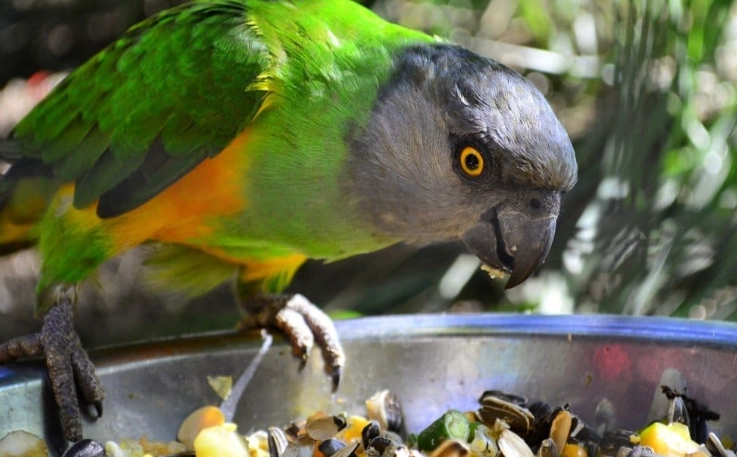
Birds have incredibly sensitive respiratory systems. Dust, dander, and dried droppings can harbor bacteria and fungi, leading to respiratory infections. The Merck Veterinary Manual notes that poor hygiene is a common contributor to avian health issues. Ammonia from accumulated waste can irritate their eyes and lungs.
Then there's the behavioral impact. A dirty, cluttered environment can stress a bird, leading to feather plucking or aggression. A clean cage is a predictable, safe space for them.
But here's the subtle mistake many new owners make: they prioritize cage aesthetics or price over cleanability. They buy a gorgeous, ornate cage with dozens of nooks, crannies, and decorative scrolls. It looks amazing in the store. Two weeks later, they're using a toothpick to dig seed hulls out of the Victorian-style flourishes, regretting every second. The cage's beauty becomes its biggest flaw.
The goal is a cage where the design works for you, not against you.
Key Design Features of an Easy-Clean Cage
When you're shopping, ignore the marketing fluff. Look for these specific, tangible features. They are the difference between struggle and simplicity.
The Non-Negotiable: A Full-Width, Slide-Out Tray
This is the single most important feature. The tray should pull out smoothly from the front or side, not require you to lift the entire cage. It should be deep enough to contain substrate and debris. Avoid trays with a lip that's too shallow—everything spills over the edge when you try to remove it. I learned that the hard way.
Large Access Doors (And Plenty of Them)
You need to get your hand, arm, and maybe a spray bottle inside comfortably. A single small door means you're constantly repositioning the cage to reach corners. Multiple large doors, especially one that opens fully like a gate, let you access the entire interior without contortions. It makes wiping down perches and walls infinitely easier.
The Magic of a Removable Grating or Bottom Grill
Many good cages have a wire grid that sits above the tray. Your bird walks on this, and droppings fall through onto the tray below. The crucial part? This grid should be removable. Why? Because your bird will inevitably drop sticky food (hello, mango!) directly onto it. Being able to take the whole grid to the sink for a soak and scrub is a game-changer compared to trying to clean it in place.
Smooth, Non-Porous Surfaces
Run your hand along the interior walls and bars. They should feel smooth, not textured or powdery. A high-quality, baked-on powder coating is excellent—it resists rust and doesn't give grime anything to grab onto. Bare, cheap metal or rough paint will stain and chip, making cleaning harder over time.
Minimalist Design & Smart Feeder Placement
Fewer decorative elements mean fewer places for mess to hide. Also, check where the food and water cups attach. External hooks or doors that allow you to change cups without reaching inside the cage prevent you from spilling seed everywhere. It's a small detail with a big impact on daily tidiness.
Your Step-by-Step Guide to a Speedy Clean
With the right cage, here's how a deep clean can look. This is my actual routine, honed over years.
Gather Your Arsenal First: A dedicated spray bottle with a bird-safe cleaner (1 part white vinegar to 1 part water works great), a stack of old newspaper or paper towels, a dedicated scrub brush or sponge, a trash bag, and a bucket of warm water.
Step 1: The Bird Relocation. Move your feathered friend to a safe play stand or a small, temporary travel cage in another room. This is non-negotiable for their safety and to avoid inhaling cleaning fumes, even from vinegar.
Step 2: The Great Disassembly. Take out all toys, perches, and dishes. Remove the slide-out tray and the removable bottom grill. This is where your cage's design earns its keep. If it takes more than 30 seconds, you know what to look for next time.
Step 3: The Dry Shed. Dump the old liner and debris from the tray into the trash. Use a dry paper towel to wipe off the bulk of the loose seed hulls and dust from the grill and tray. Getting the dry stuff out first makes the wet cleaning much faster.
Step 4: The Soak & Scrub. Take the tray, grill, and dirty dishes to the sink or tub. Let them soak in warm, soapy water for 5-10 minutes. This loosens everything. While they soak, spray down the empty cage interior and bars with your cleaner. Let it sit for a minute to break down gunk, then wipe everything down with paper towels or a cloth. The large doors make this a breeze.
Step 5: Rinse & Dry. Scrub the soaked items, rinse thoroughly, and dry them completely. Dampness leads to rust and mildew. Wipe down the cage interior with a damp cloth to remove any cleaner residue. Let it air dry for a few minutes.
Step 6: The Rebuild. Put the dry grill and tray back. Line the tray with fresh newspaper (my preferred cheap, easy liner) or other substrate. Wipe down perches and toys before returning them. Refill dishes with fresh food and water.
Total hands-on time? About 10-15 minutes for a well-designed cage. The soaking does the heavy lifting.
Beyond the Basics: Pro Tips for Maintenance
Deep cleaning is weekly, but daily upkeep prevents the big mess.
The 2-Minute Daily Tidy: Every morning when you refresh food and water, take a moment. Use a small handheld vacuum (dedicated to pet use) to suck up loose seed hulls around the cage base. Spot-clean any obvious droppings on perches with a damp paper towel. This keeps things sanitary and makes the weekly clean negligible.
Liner Strategy: I'm not a fan of loose substrates like corn cob or walnut shell for the tray. They hide waste, can mold, and are messy to change. Plain newspaper, butcher paper, or specifically designed cage liner paper lets you see the mess and lets you roll it up and toss it in one motion. It's the ultimate in easy clean bird cage management.
Perch Rotation: Have a few extra perches. On cleaning day, swap the dirty ones for clean ones. Soak the dirty set in the sink while you clean the cage. You're always a set ahead, and your bird gets variety.
Top Cage Picks for Easy Maintenance
Based on the features we've discussed, here are a few styles that consistently get high marks from owners who value their time. Remember, the best cage is the largest one you can afford that also cleans easily.
| Model Type | Why It's Easy-Clean | Best For | Watch Out For |
|---|---|---|---|
| Flight Cages with Play Tops | Simple rectangular design. Huge front doors. Deep, full-width slide-out trays. Minimal fuss. | Small to medium birds (parakeets, cockatiels, lovebirds) who need space. | Some cheaper models have thin metal grills that can bend. Check the tray slide mechanism. |
| Powder-Coated Dome Tops | Smooth, sealed surfaces. Large side doors are common. Good tray systems. | A wider variety of birds. The rounded top has fewer corners for debris to collect. | The dome top can sometimes have a seam that needs attention. Ensure the feeder doors work well. |
| Stainless Steel Cages | The gold standard. Non-porous, impervious to rust, and incredibly easy to wipe down. Often have superb access. | Long-term owners, larger birds (African Greys, Amazons), or anyone with allergies. A lifetime investment. | The upfront cost is high. Ensure it has a removable tray/grill system, as some veterinary-style ones don't. |
I made the switch to a well-designed flight cage years ago, and the difference was night and day. The chore became a quick task. It changed my relationship with cage cleaning entirely.
Your Cleaning Struggles, Solved
My bird is terrified when I clean. What can I do?
Turn cleaning into a positive routine. Keep your bird in the same room if possible, but at a distance. Talk to them calmly. Offer a high-value treat in a separate dish after you finish. Over time, they'll associate the sight of the cleaning supplies with something good coming. Rushing or moving them abruptly will only heighten anxiety.
What's the biggest mistake people make when choosing an "easy clean" cage?
They assume all cages with a slide-out tray are equal. They're not. Test the tray in the store (or read detailed reviews online). Does it stick? Does it have a flimsy handle that will break? Is it made of thin plastic that will warp? The tray is the workhorse of the operation. A bad one will frustrate you every single day.
I hate the smell. Even after cleaning, there's a lingering odor.
This often points to two issues. First, incomplete rinsing. Cleaner or vinegar residue can smell odd. Always do a final wipe with plain water. Second, and more likely, porous materials. If perches, toys, or the tray itself are made of untreated wood or cheap, absorbent plastic, they soak up odors. Consider switching to more sealed materials like manzanita wood perches or acrylic toys. Baking soda sprinkled on the dry tray under the liner can help neutralize smells between changes.
Is it safe to use a pressure washer or hose on my bird cage outside?
I strongly advise against it for most powder-coated cages. The high pressure can force water into seams, joints, and under the coating, leading to rust from the inside out. It can also damage the protective finish. A garden hose on a gentle shower setting is okay for a thorough rinse if you've used a mild soap, but meticulous drying is absolutely critical. For stainless steel cages, it's less risky, but you still need to ensure no moisture is trapped.
My cage has rust spots. Can I still make it easy to clean?
Rust makes cleaning harder because it creates a rough surface. You can carefully sand the spot smooth, then apply a bird-safe, non-toxic sealant like a clear acrylic spray (used in a very well-ventilated area away from the bird, with curing time). However, this is a stopgap. Rust is a sign of coating failure, and the cage is nearing the end of its safe, easy-to-clean life. Start planning for a replacement with better materials.
The journey to an easy clean bird cage starts with recognizing that the struggle is usually a design problem, not a you problem. Investing in a cage built for maintenance saves you hundreds of hours over your bird's lifetime. More importantly, it ensures those cleanings happen consistently, creating a healthier, happier home for your feathered companion. Stop fighting your equipment. Get a cage that works with you.


Join the Conversation