Your Grooming Journey
Let's be honest. The idea of giving your dog a full grooming session at home can feel pretty daunting. I remember the first time I tried to bathe my Golden Retriever, Max, in our tiny apartment bathroom. It was less of a bath and more of a indoor flash flood combined with a wrestling match. Water everywhere, soap in my eyes, and one very unhappy, soggy dog. I almost gave up and swore to just pay the groomer forever.
But you know what? I stuck with it. And now, years later, our at-home grooming sessions are a breeze. Not only do I save a significant chunk of money (those grooming bills add up fast!), but it's become a real bonding activity. Max actually gets excited when he sees the towels come out. If I can go from a total disaster to a confident home groomer, you absolutely can too.
That's what this guide is for.
We're going to strip away the fear and complexity. No professional jargon, no intimidating equipment lists. Just clear, practical dog grooming tips and tricks at home that actually work for real people with real dogs. Whether you have a short-haired Dachshund or a fluffy Poodle mix, the core principles are the same. It's about patience, the right tools, and a good routine.
Why Bother? The Real Benefits of Home Dog Grooming
Before we dive into the how, let's talk about the why. Sure, saving money is a huge perk. A professional groom can easily cost $50-$100+ depending on your location and your dog's size and coat. Doing it yourself a few times a year adds up to a nice vacation fund.
But the benefits go way deeper than your wallet.
First, it reduces stress for your dog.
Many dogs find the grooming salon stressful. The strange noises, the other anxious dogs, the unfamiliar people handling them. At home, it's a calm, familiar environment. You're a familiar face. This can make a world of difference for an anxious pup.
Second, it forces you to get hands-on. I mean really hands-on. You'll become an expert on your dog's body. You'll notice that little bump behind his ear that wasn't there last week. You'll see if his skin is dry or if his nails are getting too long. This regular, close inspection is one of the best things you can do for your dog's long-term health. You catch issues early.
And finally, the bond. There's a quiet trust that builds when you carefully clean your dog's ears or trim around their paws. They learn to be still for you. You learn to be gentle and patient. It's a win-win.
The Non-Negotiable Toolkit: What You Actually Need
You don't need a salon's worth of equipment. In fact, starting simple is best. Trying to use twenty different brushes and gadgets will just confuse you and annoy your dog. Here's the core arsenal I've found indispensable after years of trial and error (and yes, some errors).
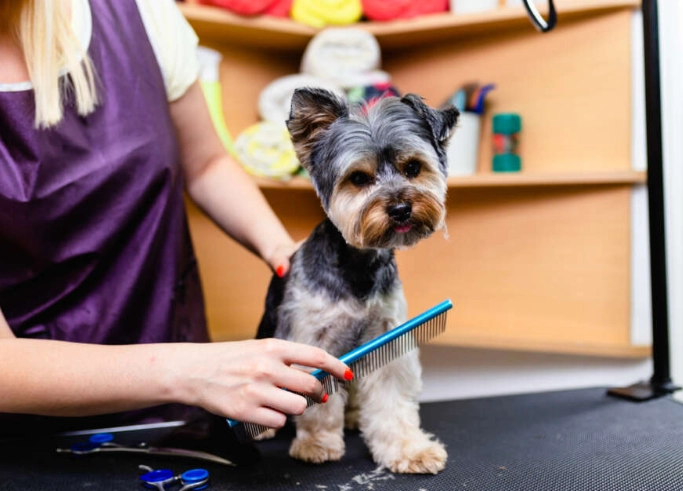
For Brushing & De-Shedding
This is where most people go wrong. They buy a brush that looks good but is totally wrong for their dog's coat type. It's like using a shovel to eat soup.
| Coat Type | Best Brush/Tool | What It Does & Why It Works |
|---|---|---|
| Short, Smooth Coats (e.g., Beagle, Boxer, Dachshund) | Rubber Curry Brush or Grooming Mitt | Grabs loose hair from the undercoat and polishes the topcoat. Feels like a massage! My friend's Boxer leans into it like it's the best thing ever. |
| Double Coats & Heavy Shedders (e.g., Husky, Golden Retriever, German Shepherd) | Undercoat Rake & Slicker Brush Combo | This is the magic duo. The rake gets the dense, woolly undercoat out (the source of the tumbleweeds in your house). The slicker then smooths the topcoat. The American Kennel Club (AKC) has a great guide on brushing different coat types that's worth a look. |
| Long, Silky, or Curly Coats (e.g., Yorkshire Terrier, Maltese, Poodle) | Metal Comb & Pin Brush | You need to prevent mats from the skin out. The pin brush is gentle for daily detangling. The fine-toothed metal comb is your truth-teller—if it glides through the coat to the skin without catching, you're tangle-free. |
A quick word on slicker brushes: some are painfully prickly. Always test the pins on the inside of your wrist. If it hurts you, it will definitely hurt your dog. Look for ones with rounded tips.
For Bathing
Skip the human shampoo. The pH is all wrong for dog skin and can strip essential oils, leading to dryness and irritation. A good quality dog shampoo is a must. For most dogs, a simple oatmeal-based or hypoallergenic formula is perfect.
- Dog-Specific Shampoo & Conditioner: Conditioner isn't just for show. It helps detangle, moisturize, and makes brushing after the bath infinitely easier.
- Non-Slip Mat: This is a safety essential. A scared dog on a slippery surface is an accident waiting to happen. A cheap rubber bath mat gives them confidence.
- Handheld Sprayer or Large Cup/Jug: A detachable showerhead is a game-changer for rinsing. If you don't have one, a big plastic pitcher works fine.
- Super-Absorbent Towels: Microfiber towels are amazing. They soak up so much more water than regular towels, which means less time with the blow dryer.
For The Finishing Touches (Nails, Ears, Teeth)
- Nail Clippers or Grinder: Guillotine-style or scissor-style clippers work. I personally prefer a grinder (like a Dremel tool for pets) because there's zero risk of cutting the quick. It's noisy, but most dogs get used to it.
- Canine Ear Cleaner & Cotton Balls: Not Q-tips! Never stick anything into the ear canal. You just clean the parts you can see.
- Dog Toothbrush & Toothpaste: The toothpaste is enzymatic and comes in flavors like poultry or peanut butter. Human toothpaste is toxic to dogs.
- Styptic Powder or Cornstarch: In case you clip a nail too short and it bleeds. It happens to everyone. Have it on hand to stop the bleeding quickly.
The Step-by-Step: Your First Successful Home Groom
Alright, you've got your tools. Let's walk through the process. The key is to break it down into manageable stages. Don't try to do a full groom in one go if your dog is new to this. Spread it over an afternoon or even two days.
Stage 1: The Pre-Bath Brush-Out
This is the most important step that most beginners skip. Never bathe a matted or heavily tangled dog. Water will tighten those mats into impossible, felt-like clumps that may need to be shaved out. Brush thoroughly first, using the right tool for your dog's coat.
Work in sections. Start at the feet and work upward, holding the hair at the base to avoid pulling the skin. If you find a small mat, try to gently work it apart with your fingers or the end of a comb. For big mats, it's kinder to carefully cut them out with blunt-tipped scissors.
Take your time. Put on some music. Give lots of treats.
Stage 2: Bath Time Without the Battle
Place the non-slip mat in the tub or shower. Use lukewarm water—not hot, not cold. Test it on your elbow like a baby's bath.
- Pre-Soak: Thoroughly wet your dog's coat all the way down to the skin. This can take a few minutes for dense coats.
- Lather Up: Dilute the shampoo with a bit of water in your hand or a bottle. Apply from the neck down, avoiding the eyes and ears. Massage it in well. I focus on the dirtiest areas like paws, underbelly, and back end.
- The Rinse: This is crucial. Rinse, rinse, and rinse again. Soap residue is a major cause of itchy skin. Run your fingers through the coat against the grain. If it feels squeaky clean and not slippery, you're good.
- Condition: Apply conditioner, leave it on for a few minutes as directed, then rinse thoroughly.
Stage 3: Drying & The Final Brush
First, let your dog do the "shake-off." Towel dry vigorously. For long-haired dogs, you can gently squeeze sections of the coat with the towel.
Now, you have a choice. Air drying is fine for short-haired dogs. For medium or long coats, I highly recommend using a blow dryer on a low, cool heat setting. Keep it moving constantly and hold it at least a foot away. The goal isn't to bake them, just to speed up the process. A damp dog will try to roll on the carpet, and a damp undercoat can lead to hot spots (skin infections).
As you dry, brush again.
This is where you get that beautiful, fluffy finish. For curly coats, you can even use the dryer and a brush to straighten and style the hair as it dries.
Tackling the Tricky Bits: Nails, Ears, and Teeth
These areas make people nervous. Let's demystify them with some straightforward dog grooming tips and tricks at home.
Nail Trimming Without the Drama
The fear is cutting the "quick"—the pink, blood-filled part inside the nail. On light-colored nails, it's visible. On black nails, it's a guessing game.
- Go Slow: Take off tiny slivers at a time. Look at the cut end after each clip. When you start to see a whitish, chalky circle with a potential darker dot in the center, stop. You're getting close to the quick.
- Grinder Alternative: A grinder files the nail down gradually. It's slower but eliminates the risk of a painful cut. The noise bothers some dogs, so introduce it slowly with treats.
- Frequency: A good rule is if you hear the nails clicking on the floor, they're too long.
Ear Cleaning Made Simple
Check ears weekly for redness, bad odor, or excessive dark wax. To clean, soak a cotton ball with veterinary ear cleaner. Gently wipe the inside of the ear flap and the accessible part of the outer ear canal. That's it. The dog will shake out any excess. The Merck Veterinary Manual provides a reliable overview of basic ear care and cleaning in dogs.
Dental Care That Doesn't Feel Like a Fight
Start by just letting your dog lick the tasty toothpaste off your finger. Then progress to rubbing it on their gums with your finger. Finally, introduce a soft toothbrush or finger brush. Aim for the outside surfaces of the teeth in a circular motion. Even doing it a few times a week makes a huge difference.
Answering Your Burning Questions
Wrapping It Up: You've Got This
Learning these dog grooming tips and tricks at home is a journey, not a one-time event. Your first attempt might be messy. You might cut a nail a little too short. The haircut might be a bit... lopsided. That's okay. I've been there.
The goal isn't perfection. The goal is a healthy, clean, happy dog and a stronger bond between the two of you. You'll save money, you'll know your dog better than anyone, and you'll gain a really satisfying skill.
Start small.
Pick one thing to master this week—maybe just a really good brushing session. Next week, add a bath. Build your confidence and your dog's trust slowly.
Before you know it, you'll have a routine down. You'll look at your clean, fluffy, well-cared-for dog and think, "I did that." And trust me, that feeling is worth every bit of the initial effort.


Join the Conversation